Bandsaws are heavy and powerful tools used for cutting, shaping, and trimming wood or metal. They come in many different shapes, sizes, and configurations. But, they all share one thing in common – their blades need regular maintenance.
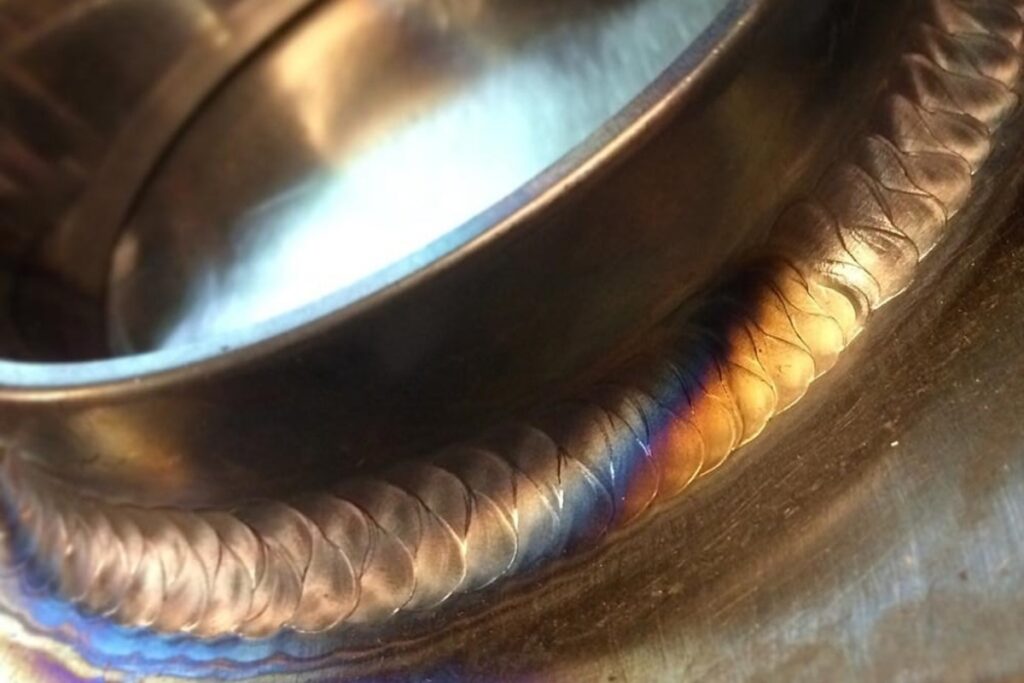
However, can you TIG weld bandsaw blades? Provided the correct steps are taken, TIG welding is a reliable choice for fixing a damaged bandsaw blade.
Additionally, when you own a bandsaw, it’s important that your blade is kept sharp at all times. This is because dulled edges can cause serious accidents when using this tool.
It may seem like an easy job. Nevertheless, there are some things you should know before attempting to TIG weld your bandsaw blade.
Let’s find out how to do so!
How to TIG Weld a Bandsaw Blade
Fixing a bandsaw blade with a TIG torch requires meticulous attention to detail. Otherwise, the weld may fail, and you’ll have to buy a new bandsaw blade. Here are some steps to follow while using TIG to repair the broken bandsaw blade.
1. Prepare the Bandsaw Blade
The first thing to do is remove any old paint or other finishes from the band saw blade. If possible, take off all of the hardware on both sides of the blade so you have access to the entire length of the blade.
Make sure the blade has been thoroughly cleaned with a solvent (such as denatured alcohol) and degreaser prior to making repairs. This ensures that no contamination gets into the joints during the repair process.
Clean out all the debris from inside the motor housing and remove the dust covers over each side of the machine. Also, be careful not to touch the metal parts while cleaning, because oil and grease left behind after use could damage your skin if you get them wet.
Once everything is completely dry, inspect the blade carefully for cracks, splits, chips, dings, etc. These issues must be repaired immediately because they increase the risk of injury, especially if they occur near moving parts.
2. Secure the Bandsaw Blade
Once you find a crack or chip in the bandsaw blade, you’ll need to secure it properly. One way is to replace the damaged area with new material cut from another piece.
In most cases, however, the best bet is to simply grind down the affected areas until they are smooth again. This helps ensure that nothing happens once you start welding. To prepare the blade for grinding, use sandpaper lightly across its surface.
The goal here is to rough up the edge enough to help eliminate splinters and burrs along the line where the band was split.
3. Apply Flux Paste
Next, apply flux paste liberally onto the newly roughed-up portion of the blade.
Flux serves two purposes: it acts as a water repellent, which prevents moisture from damaging the molten metals, and it provides conductivity between the pieces being joined.
Now set the blade on top of a sturdy workbench or table and position yourself approximately 4 feet away from the end of the blade.
4. Get Some Shielding Gases
Before beginning the actual welding operation, you’ll need to fill up the machine’s exhaust fan with high-grade argon gas. Using pure argon instead of air reduces oxidation reactions that would otherwise result in poor-quality joints.
Additionally, argon doesn’t produce ozone, which causes breathing problems for people who suffer from asthma and emphysema conditions. Finally, high-grade argon minimizes exposure to oxygen, which can lead to rust formation at the joint.
While low-cost argon tanks won’t provide sufficient quantities of pure argon required to perform proper TIG welding, higher-end models include special filters designed to prevent impurities from entering the system.
Regardless of what kind of tank you choose, make sure to check your unit periodically to avoid leaks. A leaky filter poses a significant health hazard since toxic gases such as carbon monoxide and nitrogen oxides are constantly leaking out.
5. Use Pulse Welding
When performing TIG welding, you’ll need to stick with a specific technique known as pulsed waveform welding. By doing so, you reduce the amount of heat produced at the joint and allow more time for better penetration. This results in stronger, cleaner welds.
To begin, attach a copper electrode directly to the tip of the torch nozzle. Then turn the main power switch on slowly, allowing current to flow through the gun and establishing electrical contact with the ground rod.
Afterward, hold the trigger lever firmly against the rear handlebar, applying constant pressure. Keep in mind that too much force applied to the trigger can burn your hand. Slowly raise the trigger to its full power setting without pulling back straightaway.
Wait about 1 second, then release the trigger quickly. Repeat these steps several times per minute throughout the procedure. The idea is to maintain a slow rate of speed while keeping the arc stable. Pulses shouldn’t last longer than 10 milliseconds.
You are now ready to move forward.
6. Use Consistent Travel
As previously mentioned, the ideal method for joining bandsaw blades involves grinding down the affected section and filling in the groove with filler metal.
Dealing With Complex Cuts
However, when dealing with complex cuts and curves, sometimes it’s necessary to bypass this approach and join the broken sections together with an overlay bead. Overlay refers to the extra layer of metal added around the perimeter of the joint to strengthen the interface.
Choosing Between Gap Spacing and Overlapping
Before proceeding with this type of welding, it’s imperative to decide whether you want to overlap the ends of the blade itself or create a gap. Gap spacing allows room for additional layers of filler metal to be inserted later.
But if you plan to add an overlay bead, you’ll need to determine exactly where the seam will fall within the overall width of the blade.
For example, if you’ve decided to space gaps evenly apart, don’t forget to leave a small distance between the two pieces of metal slightly wider than the gap because it needs to accommodate the thickness of the overlay bead.
Now that you’ve got a good grasp of the basics, let’s proceed with actually creating a seamless ring around the blade.
7. Create Seamless Ring Around the Blade
First, lower the shield cup assembly toward the upper plate. Position the bottom part of the shield cup close to the centerline of the blade and adjust the height control accordingly. Then lift the shield cup back up.
Keep the Tip of the Torch Pointed Downward
Remember to always keep the tip of the torch pointed downward. Adjust the height control according to the desired depth of the weld puddle. Move the torch head upwards towards the middle of the blade until it reaches the level of the lowest point of the groove.
Rotate the TIG Torch 90 Degrees Clockwise
Next, rotate the torch 90 degrees clockwise until the tip is pointing down at the right angle above the topmost third of the blade. Lower the fuel/air mixture valve control until only a very thin stream of blue flame emanates from the tip.
Hold the trigger steady against the rear handlebar and wait for the red light to flash, indicating that the voltage is correct. Start applying pulses to the trigger slowly, increasing the intensity gradually until the color change occurs faster than normal.
Continue Pulsing the Trigger
Continue pulsing the trigger in this manner until you see the first spark. This indicates that the tip is touching the base metal. At this point, stop pulsing and continue holding the trigger steadily.
This prevents the tip from jumping back up due to residual charge. Instead, pull the trigger downwards gently to break the arc free from the tip. Withdraw the tip backward away from the edge of the blade slowly.
Don’t Rush this Step
Don’t rush this step or you might accidentally kick the tip upward, which could harm someone standing nearby. Wait until the yellow spark disappears before lowering the tip closer to the base metal.
Do this three or four times per inch until you reach the appropriate depth. Note that every few inches, try to pause briefly to check progress since it takes a while to complete a whole pass.
Repeat the same steps starting on the other side of the blade. As soon as you finish the opposite half of the blade, flip the torch upside down and align the tip with the opposite edge. Proceed with the same pattern of overlapping passes.
Add an Overlay Bead
Your final step will involve adding an overlay bead. Use fine grit abrasive paper to grind a V-shaped notch into the outside edge of the blade where the two halves meet. Then file to smooth the transition zone to minimize stress concentrations.
Take care not to grind deeper than 3 mm below the surface. Once finished, wipe away any excess sludge and dirt with a soft cloth. Allow the blade to cool overnight. Repeat the process whenever needed.
8. Reanneal the Bandsaw Blade
Reheat the blade under continuous direct current heating for 30 minutes at least twice weekly to restore strength and flexibility.
Always remember to wear safety goggles and gloves when handling heated materials.
9. Grind the Weld
After treating the blade with acid, rinse it well and soak it in hot water containing baking soda. Let it soak long enough to soften the epoxy coating protecting the blade core. Take the blade out of the soaking liquid and place it on the scale.
Grind down the area surrounding the split with coarse-grain diamond-tipped grinder wheels. Go slowly, taking frequent breaks to rest. File down the exposed surfaces of both bands smoothly with a medium grain wheel to achieve a flat, even profile.
Clean up any loose particles of material with a chamois cloth. Rinse well and repeat the process until you’ve removed the majority of large flakes. Apply a generous amount of flux to the freshly ground blade.
Again, follow closely the manufacturer’s instructions regarding the application of flux. Set aside the blade and cover it tightly with plastic wrap. Leave it overnight to cure. Repeat the process until the blade is fully cured.
Tips on TIG Welding a Broken Bandsaw Blade
There are a couple of tips to consider when repairing a bandsaw blade. Firstly, never use the machine until the blade is repaired. The old blade can damage the new one if you attempt to cut anything with it.
Secondly, when repairing the blade, don’t apply too much heat or pressure. The best thing to do is to lightly sand the new edge of the blade and file down any sharp points before cutting any pieces.
Lastly, consider that sometimes a bandsaw can have a crack in the blade or even be defective in some way and you have no choice but to replace it. If this is the case, you can buy a new blade for about $5-50.
If you are having problems with your bandsaw blade, then you will need to TIG weld it yourself or get a professional to repair it. This is especially true if the blade is not usable or has any serious damage.
How to Get Your Band Saw Blade Ready for Repair
There are many ways to fix a broken blade. Some of the steps below will help you remove the blade from the bandsaw and clean it up so that it is ready for repair or replacement.
It is important to remove the blade from the bandsaw and clean it well.
1. Carefully Remove the Blade From the Bandsaw
The first tip is to remove the blade from the bandsaw. Use a tool like a hack saw or puller to loosen and then remove the blade. This will give you more room and make it easier to work on the blade.
Make sure you keep track of which side of the saw has been used before and after you take the blade off. If there is a side that looks worn down, then that side is probably the one that needs to be replaced.
2. Clean the Bandsaw Blade
Remove all of the debris from around the bandsaw blade by using a vacuum or an air hose. Make sure that you clean both sides of the blade as well as any saw teeth that may have been damaged.
You can also look for any chips, cracks, or dents in them by looking at them with a magnifying glass. If there is any damage or defect, repair the blade by using a grinding wheel.
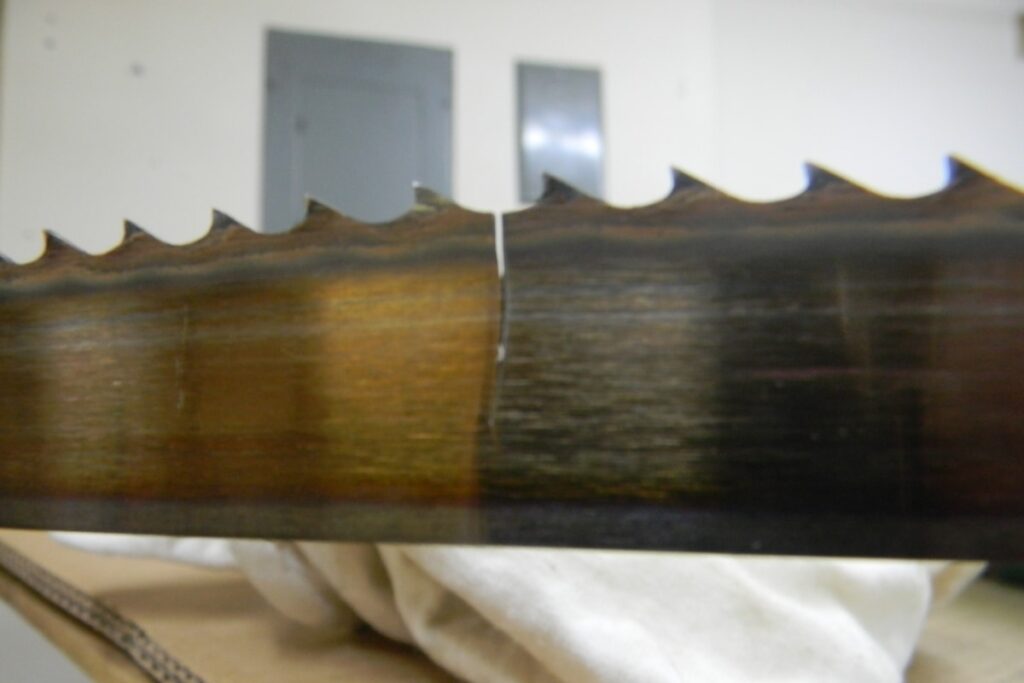
3. Examine the Blade and Saw Teeth for Signs of Damage
If you find any defects in the saw teeth, then you have three options. You can repair them, replace them with new blades, or get a professional repair service.
If someone is helping you out, you’ll need to tell them what kind of bandsaw you have and whether it has an automatic or manual blade changer. They will also need to know if the saw is a single-edged or double-edged blade and how many teeth it has.
4. Determine if the Blade Can Be Repaired
Next, determine if the blade is still usable and if there are any problems with the blade itself. You can also check for chips, cracks, or dents on the saw teeth by looking at them closely with a magnifying glass.
If it is usable, then you will need to decide if it needs to be repaired or replaced. You may find that some of the teeth are worn down or have a chip in them, while others have no problem with their condition.
5. Know When to Get a New Bandsaw Blade
Are the blades damaged beyond repair? Then it’s time to replace the blade.
Bandsaw blades can be purchased at any home improvement store and are usually quite inexpensive. If you do not want to purchase a new blade, you can also look for used blades on eBay or Craigslist.
It is important that you carefully inspect these blades before buying them. Make sure there are no cracks in the blade and that there is nothing wrong with it.
How to Keep Your Bandsaw Blade in Good Shape
The first tip is to make sure that the bandsaw is working properly. If you are not using the saw, then it is important that you use it for at least a few minutes each day to make sure it works.
If you have never used a bandsaw before, then you should check out some YouTube videos on how to use it. You can also find a lot of information on how to use them online.
1. Keep the Bandsaw Blade Sharp
Suppose the saw is not sharp, then you will have a lot of trouble making any cuts. The easiest way to sharpen your bandsaw is to use a bench grinder that has a small slot in it for the saw blade. You can find them at any hardware store or home improvement store.
You can also learn how to use your bandsaw properly and safely by reading some online tutorials and videos on the subject.
2. Use the Right Blade for Your Bandsaw
The second tip is to use a proper blade for your bandsaw. There are a lot of different kinds of blades available on the market today, and they all do different things.
Some of them are made for general purposes, others are designed to cut sheet metal, and others are made for making plywood or hardwood cuts.
You should also learn how to use the different kinds of blades that are available for your bandsaw. Some are designed for cutting plywood or sheet metal, while others are designed to cut hardwood.
It is important to learn how to use them correctly so that they last a long time and do not break down on you. Knowing how to sharpen them properly will prevent problems from occurring while using them.
3. Learn to Effectively Work With a Bandsaw
The third tip is to use the right bandsaw blade for your bandsaw in the right manner. This ensures that it works the best for your specific project and lasts the longest.
Not sure which type of blade you need? Check out some online videos that show how different kinds of blades work and what they are designed to do.
You can also find a lot of information on the internet about different kinds of blades and what they are designed to do. If you are looking for a bandsaw blade that is not too expensive, then you should look at the 3M saw blades.
4. Utilize Appropriate Lubrication for Your Bandsaw
The fourth tip is to use proper lubrication for your bandsaw. The right kind of lubrication will make the saw last longer, and it will also make it easier for you to use.
The best way to lubricate your bandsaw is by using a light oil that has a little bit of sawdust in it. You should let the saw run through a few coats of oil so that the blades get coated and you can cut more easily.
For more information, discuss with your local hardware store or home improvement store. They will be able to help you find the right kind of oil that you should be using for your saw.
The Bottom Line
The bandsaw blade is one of the most important parts of the bandsaw and it is important to keep it in good working condition. If you take care of your bandsaw blades, then you will be able to make many cuts with them for a long time.
Bandsaws are some of the most used power tools that are available today. They are very useful and easy-to-use tools that can do a variety of things for many people.
While they have become very popular, there are a lot of things that can go wrong with them. If you do not know how to take care of your bandsaw, then it is important that you learn how to do so.
In this article, we’ve gone over some of the most common problems with bandsaws and how to deal with them. We’ve also talked about how to fix the bandsaw blades so that they work like new again. See you in the next article.
Darell is a Certified Welding Engineer (CWEng) with over 23 years of expertise in TIG, MIG, MAG, dual flux, and stick welding. He is a senior welding engineer who has a desire to share his experience. Visit unwelded.com and join Darell as well as other welding enthusiasts in obtaining fabrication knowledge, amazing welding gadgets, and useful welding insights.