The ability to create strong joints without melting them can be learned with practice. There are also techniques that help increase your chances of successful fusion when working on especially thick or difficult-to-weld materials.
These include butting together two pieces of metal instead of overlapping one at their edges; backstamping the joint before making contact; preheating the area where the joint will eventually form; using helium as a shielding gas; and adjusting the power output of the tungsten inert gas (TIG) welder.
In this article, I’ll explain how these six tips work in terms of both theory and application. You won’t need any special tools for most of what’s discussed here—all of which can be done with standard equipment.
However, if you already own a plasma cutter or have access to one, then some of the more advanced methods may come in handy.
Let’s get started!
How Thick Can a TIG Welder Weld?
Mild steel can typically be TIG welded at a rate of one-thousandth of an inch per amp. Hence, 1/8 inches of steel can be joined with 125 amps. Whereas, you’ll need at least 150 amps to TIG weld 1/8 inches of aluminum. The specifications for other metals will differ slightly.
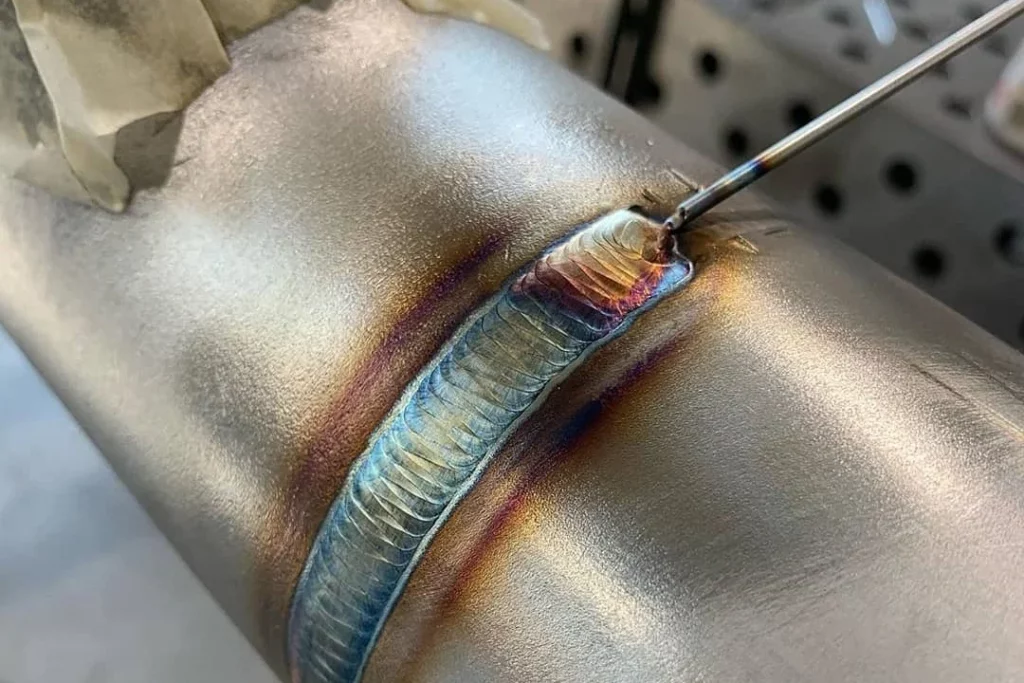
How to TIG Weld Thick Metal
You are not helpless if the material you need to weld is thicker than what your welder is capable of. Thicker materials can be welded using the following procedures.
1. Beveling the Joint
Before starting to make actual passes over the joint, it’s best to start by bevelling the edges so they’re even. This isn’t strictly necessary, but doing so helps prevent uneven heating along the length of the joint.
It also makes it easier to see exactly where you want the filler wire to go each time around. If there’s no way to bevel the edges, then take care to keep the tip of your torch perpendicular to the surface being joined during the entire process.
If you’ve never used a beveler or an oxy-propane welder before, don’t worry too much about getting everything perfect right off the bat. Instead, set up your machine so that you only bevel 1/8th of an inch deep into the joint.
Then use the same technique described above until the edge has been beveled down to half its original depth. Once you reach that point, move on to step 2.
2. Backstepping the Weld
Instead of moving straight across from corner to corner like normal, try stepping forward slightly after every pass. Doing so allows the end of the electrode to touch the edge of the sheet metal first, rather than having it scrape against it.
In other words, it gives the joint a little room to breathe. Stepping backward works similarly, though it should happen much faster since it doesn’t give the part space to cool between hits.
Key Takeaway
The key takeaway here is that you shouldn’t linger long enough on either side of the joint to melt anything past the halfway mark.
That said, you might still find yourself needing to add additional passes near the outer corners because the gap created by backstepping is narrower than the gap caused by stepping forwards, thereby prevents proper cooling and solidifying prematurely.
To avoid this problem, simply angle the nozzle downwards towards the next corner once you’ve finished backing up.
Some Points to Note
Some people recommend using different angles depending on whether you’re facing left or right while walking backward. For example, if you’re turning to face the center of the joint, you’d turn upwards while going backward.
On the flip side, if you’re looking forward, you’d walk away from the center of the joint, keeping the tip pointed downward. Personally, I rarely bother with such fancy footwork. It’s entirely unnecessary unless you’re trying to cut through heavy steel sheets.
3. Backstamp the Joint if Possible
Backstamping is the act of pushing down on the base metal with a hammer, chisel, or another tool as you’re welding it. This serves two purposes:
While some people prefer to use a chisel, others find it easier to backstamp with a hammer. In fact, many people use two hammers at once. Both techniques work just fine, and both are just as effective in terms of increasing the chances of a strong weld. The only real difference is which tool you use to strike the base metal first: a chisel or a hammer.
If you’re using an oxy-acetylene welder, you don’t need to do any backstamping at all. Instead, when you’re welding, just keep your torch tip perpendicular to the base metal as you move it around in a circular pattern. This helps keep the material in place as you’re welding.
4. Preheating the Area
One common misconception among beginners is that heat travels outward from the arc in concentric circles, reaching its maximum temperature closest to the base of the rod.
While this is true for simple metals, it becomes less accurate when dealing with thicker, harder ones. As a result, it’s often better to focus heating energy directly toward the middle of the joint rather than spread it out laterally.
How to Do It
Hold the tip of the torch close to the top portion of the joint whenever possible. By limiting the amount of exposed metal, you reduce the possibility of accidentally burning through a thin spot. A good rule of thumb is to limit exposure to no more than 20% of the total width of the joint.
Methods of Preheating
Preheating is the process of heating up the joint area prior to welding so that it’s easier to flow over and around it. There are three methods of preheating a joint:
In all three cases, the point of preheating is to increase the flowability of your base metal so that you can more easily work around the joint area when welding it together.
This not only increases your chances of a strong weld, but also reduces the chance that you’ll accidentally cut into the base metal as you’re welding. (Cutting into a base metal is a common source of weak welds.)
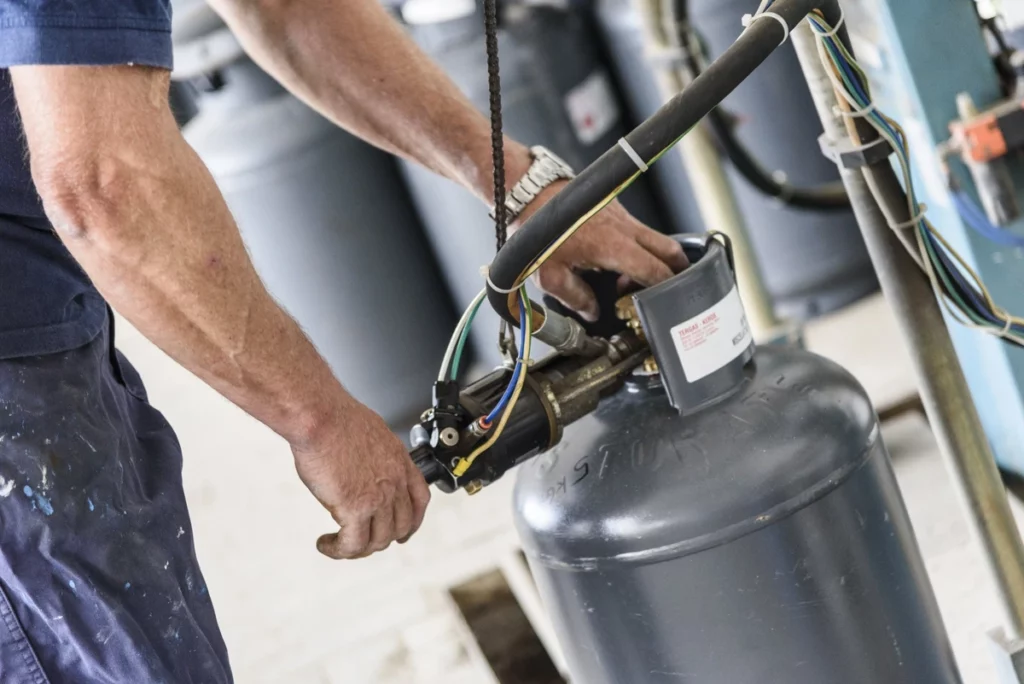
5. Using Helium as a Shielding Gas
When operating under ideal conditions, argon protects the aluminum from reacting badly with oxygen atoms emitted from the tungsten cathode.
Unfortunately, this isn’t always practical, particularly when welding large areas of stainless steel. Helium does a similar job, providing extra protection from oxidation reactions that would otherwise ruin the quality of the final product.
Guidelines
However, when welding with helium, pay careful attention to safety guidelines. First, never leave the source of the current turned on for longer than 30 seconds per cylinder full of argon.
Second, wear protective eyewear and gloves whenever handling liquid helium. Third, ensure that the exhaust tube leading away from the tank is kept clear of obstructions such as water pipes.
Otherwise, hot gases could cause fires. Finally, clean up immediately following a helium run to minimize contamination.
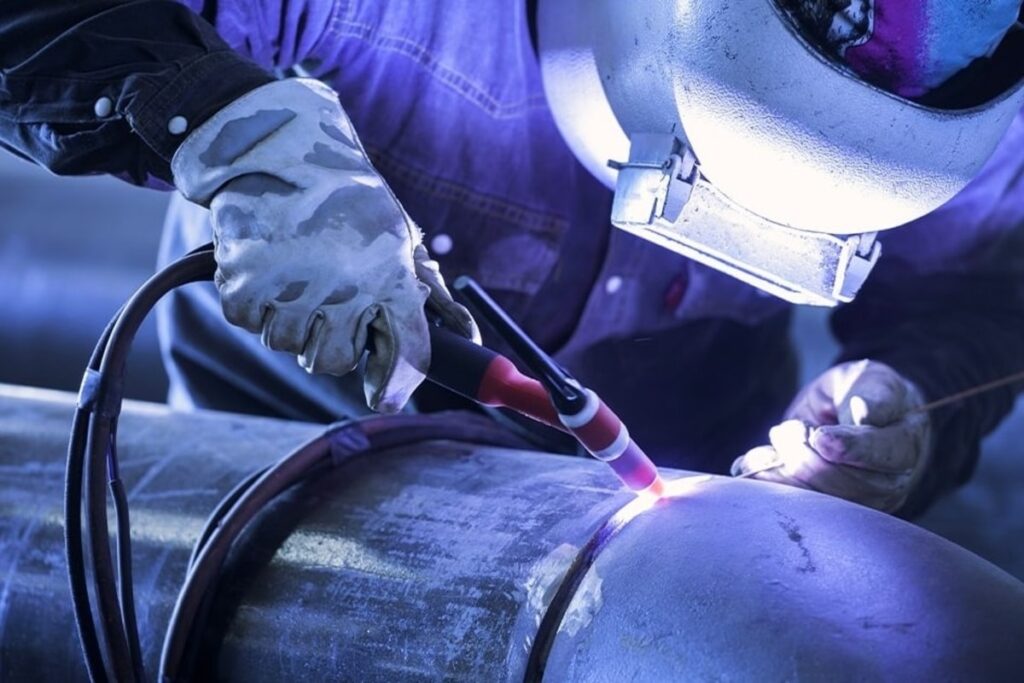
6. Increasing the Amperage of the TIG Welder
Because the primary purpose of a TIG welder is to generate intense pulses of electricity, it tends to burn through relatively small amounts of metal quickly. When working on thicker materials, it’s important to slow things down.
For starters, adjust the height of the ground plate on your machine so that the bottom of the tip sits roughly three inches below the surface being worked on. Also, lower the voltage setting of your unit to 80%.
With these changes made, raise the overall amperage level of your machine gradually until the electrical arcs become visible. At this stage, you’re ready to begin welding.
7. Arc Welding
Once you’ve reached this point, you may notice that the resulting welds aren’t very consistent. Don’t fret yet! In fact, this happens quite frequently due to several factors.
Dealing With Inconsistent Weld
One reason why it occurs is that the electrodes tend to lose a bit of momentum after each pulse. Another issue stems from improper positioning of the tip, causing inconsistent gaps between successive sparks. All of these problems can be easily solved with patience and experience.
On occasion, however, arcing may occur despite your best efforts. Fortunately, most of us aren’t worried about creating perfectly round holes within our projects. Rather, our goal is to produce something sturdy and durable. Any imperfection is thus considered acceptable.
Some Metals Require Intricate Cuts
Still, it’s wise to remember that certain types of metal require cleaner cuts. For instance, copper requires extremely smooth curves, whereas softer iron can tolerate minor dents.
Finally, if you ever feel the urge to speed up the pace of your shots, consider lowering the frequency of your bursts. Why? Because higher frequencies mean shorter intervals between individual sparks, which means hotter temperatures. If you must increase the tempo, then aim for 100 Hz or fewer.
Now, let’s consider some things to do after TIG welding a thick material.
Welding and Post Weld Treatment
The welds we produce can be treated in a variety of ways, depending on the application and product being produced. The most common treatments include grinding, cutting, and polishing.
If your application is one that does not require heat treatment, then it’s recommended that you leave the welds alone and simply rely on surface preparation for any subsequent processing steps.
Grinding
There are two primary reasons why you might choose to grind welds
For the latter, it’s important to understand that grinding is not the same thing as sanding. Sanding is a mechanical process, whereas grinding is a chemical process.
Grinding also tends to dull your blade much more quickly than sanding. If you’re unsure of the best method for your specific application, it’s always wise to consult an experienced professional first.
Cutting
Because we weld most of the parts we work on, it’s critical that we create holes that are as smooth and round as possible. If you’re looking to cut an elongated hole, then you’ll need to weld one end of the material first.
Once this is done, make sure you have enough clearance for your blade. Finally, run the blade through the part a couple times to create a rough outline of your hole.
Polishing
Polishing is another approach to creating a clean surface on your welds. This should only be used in conjunction with the appropriate polishing compound. The best approach is to start by using a piece of sandpaper to remove any scratches or dents from the welds.
Next, apply a coat of wax to your welds and let them sit for about an hour or so. Finally, apply a layer of your polishing compound and polish until smooth. You can also add a coat of wax to further enhance your finish.
Cleaning and Finishing
You don’t want to use abrasive materials on your welds. This could damage the material, which will cause it to flake off in the future. If you’re not sure if you need to clean or polish your welds, just ask a professional.
Many people suggest using acetone as a cleaner, but we generally find that it does not work well for our purposes. The best approach is to simply use water and a soft brush. Once you’ve finished cleaning, you can use the water to rinse away any excess grime or dust.
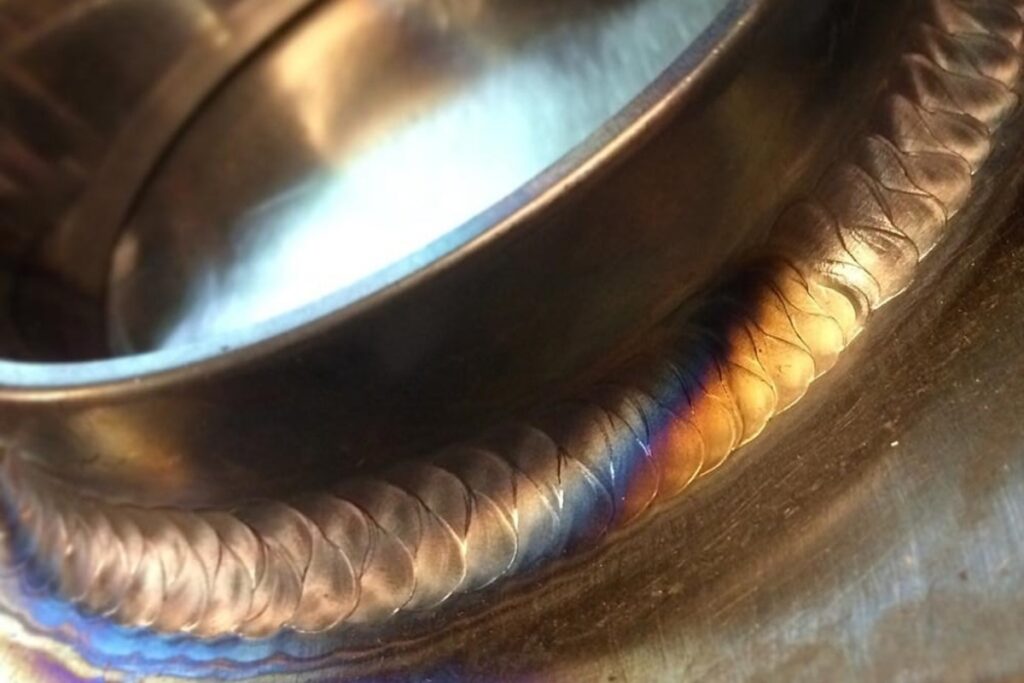
Some Examples of TIG Welding Thicker Materials
Here are some examples of how you can TIG weld thick material:
Welding Large Areas of Aluminum
This isn’t exactly the most common of metals, but it is surprisingly versatile. After all, aluminum doesn’t oxidize much over time, which means that it’s a great choice for indoor projects such as sculptures and signs. On the other hand, its softness means that it has a low melting point, so it doesn’t hold up well to extreme heat.
Aluminum Is Prone to Oxidation
To work with aluminum successfully, you’ll need to keep several things in mind. First of all, any welds made to aluminum must be relatively clean. That’s because aluminum is susceptible to oxidation, which can quickly turn the metal into a shiny sheet of pewter.
There Should Be No More Than 3 Inches Between the TIG Welder and the Workpiece
Also, when TIG welding aluminum, the tip of your TIG welder should be no more than three inches away from the workpiece. If you’re using a machine with a large base plate, then this distance will likely increase further. As always, keep an eye on your amperage level and maintain it at 80%.
Use a Tip With More Cutting Ability
Finally, the type of weld you produce will depend on the thickness of the metal. The thinner the metal, the better. And, as with other metals, when welding aluminum, it’s advisable to use a tip with more cutting ability.
Utilize a Tungsten Electrode
With that in mind, consider using a tungsten electrode rather than a carbon rod. Tungsten burns hotter and is thus better suited for thicker metals such as steel and aluminum.
Welding Thicker Materials of Steel
Steel is very versatile, but it can be a bit tricky to weld. For instance, you’ll need to pay special attention to the tip of your electrode. These tips are prone to becoming dull after only a few uses.
Mild steel can typically be TIG welded at a rate of one-thousandth of an inch per amp. Hence, a 1/8 inches steel can be joined with 125 amps. Whereas, you’ll need at least 150 amps to TIG weld 1/8 inches of aluminum.
Increase the Amperage
Why? Because steel requires a relatively high amperage in order to melt properly. If you’re using carbon electrodes, then you may have to crank up the amperage considerably in order to maintain your heat.
Control the Temperature
This brings us to another important point: temperature. If you’re welding steel, you’ll want to keep the temperature of your electrode relatively low.
By this, we mean that it should never exceed 600 °F (or 316 °C). If you’re using a TIG welder, then you may need to raise the amperage even further in order to maintain this level of heat.
And just as with aluminum, it’s best to avoid welding through layers of steel if possible. Instead, look for a clean joint that can be easily penetrated with a standard punch.
Welding Bigger Chunks of Brass
Brass is an incredibly tough metal that’s great for many industrial applications. However, it’s not a very easy material to weld.
To begin with, brass will need more time to cool than most metals, which means that you may need to increase your amperage for longer periods of time in order to maintain your heat. Also, brass has a higher melting point than most metals and is prone to cracking when welded.
To work with brass, it’s best to use a TIG welder. When welding this metal, be careful of the high amount of oxidation that’s associated with it. Also, if you’re going to weld through layers of brass, be sure to use a sharp punch and drill the hole before beginning your weld.
The Bottom Line
Welding is an art, and this article has introduced you to some of the basics. Hopefully, you’ve learned enough to move beyond the basics and explore different materials and techniques that might better suit your needs.
As you can see, many tricks exist for improving the performance of TIG welding on thicker materials. Although none of these tactics are absolutely required for success, they can certainly provide benefits.
Even if you choose to skip a particular method, know that others will often compensate for whatever shortcomings arise. And as always, practice makes perfect. Good luck!
Darell is a Certified Welding Engineer (CWEng) with over 23 years of expertise in TIG, MIG, MAG, dual flux, and stick welding. He is a senior welding engineer who has a desire to share his experience. Visit unwelded.com and join Darell as well as other welding enthusiasts in obtaining fabrication knowledge, amazing welding gadgets, and useful welding insights.