Welding can be messy. And if you want to work for hours on end without getting burned or cut, then you’ll need some quality protection. For this reason, many welders wear high-quality disposable steel mitten covers over their hands.
However, these materials tend to collect dirt quickly. They also don’t breathe very well, which means that your hands will become sweaty while working.
To keep up with all of the demands placed upon them, professional welders must clean their gloves often. Fortunately, there are multiple ways to do so properly.
This article shows how to clean your gloves correctly, along with tips from experts who have done the same before you.
Note
If you’d prefer not to read about cleaning your welding gloves yourself, try one of our recommended glove cleaners instead.
Let’s kick off by stating what you need to do before beginning the cleaning process.
Identify the Welding Glove Texture
Before you begin any cleaning process, make sure you know what material the gloves are made out of.
Choose a Cleaner Designed for a Specific Material
You should never attempt to clean synthetic leather or latex because doing so could damage those types of fabrics. Instead, choose a cleaner designed specifically for that fabric.
For polypropylene (PP) welding gloves, look for products containing mineral oil. These kinds of cleansers usually include soap as part of the formula.
You shouldn’t worry too much about nylon or cotton gloves. Most people find that regular dishwashing detergent works just fine at removing grime from these types of materials. Just wash them according to the instructions on the label until they’re nice and clean again.
Buy Products With Minimal Amounts of Wax, Oils, Fragrances
Make sure that whatever product you buy contains only minimal amounts of wax, oils, and fragrances. Those things could cause irritation and problems down the road.
Avoid Anything Labeled “Fibrous”
Finally, avoid anything labeled “fibrous” unless you absolutely positively have no other choice. That designation indicates wool felt; it’s used in making hats and similar items.
It doesn’t actually belong anywhere near animal skin. The fibers inside are sharp enough to pierce someone’s skin if touched directly.
What I Recommend
With all of that said, I personally recommend washing all of your own PP or nylon gloves with warm water several times per week.
Doing so helps prevent mold buildup, keeps me from sweating excessively during long days under harsh lighting conditions, and leaves behind less lint than most commercial brands would allow.
So now you’ve got everything you need to start cleaning. Keep reading to learn more.
How to Clean Welding Gloves
After determining what kind of material the gloves are made of, you’ll next need to decide exactly where to begin. There are three main areas worth focusing on: the fingertips, palm, and wrist area.
Wash the Gloves’ Seams
In addition to these spots, it’s important to remember that the gloves’ seams contain lots of extra crevices that accumulate dust and gunk easily.
Begin by wiping off the surface of both your palms. Next, take a small amount of liquid laundry detergent and rub it onto both sides of each fingertip. Be gentle but thorough here—scrubbing hard might irritate your skin.
Wipe Gloves With a Clothe
Next, grab a damp cloth and wipe down the outside edges of the gloves’ cuffs. Then move on to the wrists. Use a separate piece of paper towel to gently rub down the seam itself. Follow that by applying a light coat of liquid detergent to the rest of the inner side of the cuff.
Rinse the Gloves in Cool Water
Once finished, rinse the entire fingertip completely with cool water and dry it with a soft towel. Repeat this process for every single finger. Don’t forget to clean the backside of your ring fingers either.
Please note that leather welding gloves require a little different approach.
How to Clean Leather Welding Gloves
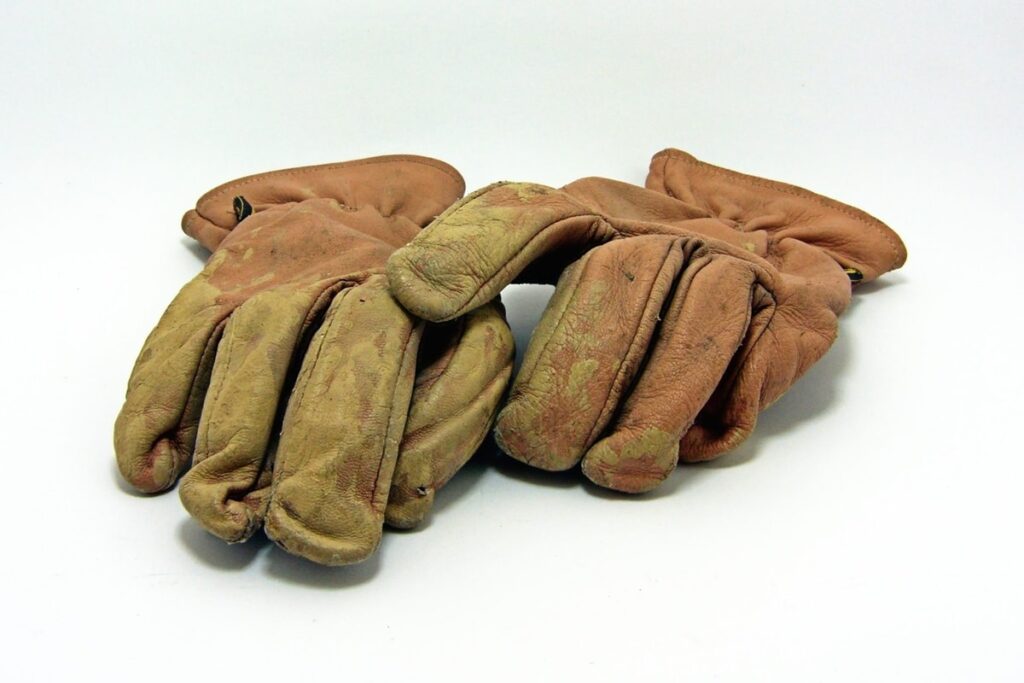
Leather gloves aren’t as simple to clean as nylon ones. Most of the best leather gloves that I’ve come across are made from cowhide leather, and they don’t have a lot of seams or crevices to worry about. Here is a detailed explanation of the steps.
1. Start With a Simple Cleaning
Begin by rubbing the entire surface of the gloves with a dry cloth. Be careful not to apply too much pressure; using too much force could cause your leather gloves to split.
2. Wash the Leather Gloves
Next, pour a small amount of liquid laundry detergent into a bowl or sink, and submerge your gloves in it.
Give the gloves a thorough wash in warm water. You can use any laundry detergent here, but don’t use any kind that contains bleach or bleaches. For best results, put the gloves in a large sink or bowl and fill it with warm water.
Make sure that the water covers all parts of the gloves, and if they’re not completely submerged, make sure to stir them around to ensure that every part gets cleaned.
Wait for about five minutes until all traces of detergent have been absorbed, and then rinse off the soap residue. Repeat this process at least twice per week.
3. Wrap the Leather Gloves in a Towel
Next, grab a clean, dry towel and wrap it around the entire glove. Make sure to cover every seam and crevice of your leather gloves as you go—this is where most of the gunk gets trapped.
4. Dry the Leather Gloves
Now that your leather gloves are clean and ready to wear again, they need to be thoroughly dried.
Grab a fresh, clean towel and dry the gloves with it—making sure to rub them in a circular motion. This ensures that your leather gloves stay soft and flexible and don’t crack or split.
After the gloves have dried, it’s time to condition them. Leather is porous, so after you’ve washed it, it’s essential to seal in any imperfections that might have come from being in contact with the outside environment.
5. Condition the Leather Gloves
After washing and drying your leather gloves, you may want to condition them. This helps prevent your leather gloves from becoming brittle over time. Simply pour a small amount of conditioner into a bowl and submerge your gloves in it.
Leave them in the conditioner for 5 minutes, and then rinse the soap residue with clean water. Repeat this process once a week if you’d like, but try not to do so too often as it may cause your leather gloves to become too soft.
You can either buy a leather conditioner from your local store or purchase a specific one online. The only problem with the latter is that they are not cheap, so it might be easier to just take care of your own leather gloves.
6. Hang the Gloves
Once done, hang the gloves on a door knob or place them on a flat surface until dry. You can either hang them on a drying rack or place them on a flat surface like a towel.
Wash Your Hands…
Once you’ve cleaned off the dirt and grime, you’ll want to make sure that you perform proper hand hygiene afterward. Always wash your hands thoroughly before putting the gloves away into storage.
Using a mild soap or disinfectant gel, wash your hands carefully and thoroughly for approximately 20 seconds. Pay special attention to places such as the knuckles, fingernails, and undersides of the fingers.
Now that you’ve washed your hands, let’s talk about how to maintain the smoothness of your new gloves.
Some Tips to Preserve the Softness of the Welding Gloves
One major problem that occurs with common industrial gloves is heat build-up caused by sweat. Because of this, it’s extremely important to store your gloves properly once you finish cleaning them.
Heat can turn gloves rigid in mere minutes, leaving you unable to work effectively later on. To help minimize this risk, follow these simple guidelines whenever possible:
1. Keep the Gloves in an Airy Place
Wear them against your body rather than hanging them on a hook somewhere. This prevents excess condensation buildup. Also, remove them immediately when you leave the shop.
Sweat tends to pool together in dark spaces, causing moisture droplets to form within the fabric and eventually warp the gloves themselves.
2. Use Breathable Mesh Pockets to Hold Your Gloves
Metal mesh bags provide excellent ventilation while keeping liquids from seeping in. Plastic ones aren’t quite as effective, though they can definitely come in handy if you live in a humid climate.
3. Don’t Hang Them on Hooks
Hooks are notorious for collecting metal shavings, which can lead to nasty infections. Hang them on clothes pins instead.
4. Store Them Vertically
Since gloves stretch when wet, wrapping them horizontally creates wrinkles and bunching. Layering them vertically allows them to lie flat and stay wrinkle-free.
5. Pack Your Gloves Neatly
Lastly, make sure that you put away your gloves right after using them. Never simply throw them into a drawer with your other tools.
Dirt particles and other contaminants can settle deep into the nooks and crannies of the leather or plastic material, leading to unsightly stains and general deterioration. Do yourself a favor and pack them away neatly.
How to Store Your Welding Gloves
Your gloves won’t last forever if you don’t give them good care. One way to ensure that they remain safe and usable for years to come is by storing them properly. Here are three different methods that you can employ to achieve this goal:
Why You Need to About Welding Gloves
As mentioned earlier, welding burns plenty of unprotected flesh. Unfortunately, some gloves offered by manufacturers cannot fully protect us from dangerous sparks.
As a result, workers have developed various techniques for protecting their hands during the toughest jobs. But none of them compare to having your own set of really tough gloves.
Of course, you probably already knew this fact since you chose to purchase them in the first place. Still, did you ever stop to think about why? Why does anyone bother buying gloves in the first place?
Do Not Neglect Your Welding Gloves
Well, consider this: Without appropriate equipment, you wouldn’t be able to complete many tasks efficiently. Even worse, you could seriously injure yourself without proper protection. So, the point is clear: always wear your gloves. Period.
That being said, it’s important to note that you should never skip weekly inspections of your gloves. Not everyone knows how to check if their gloves are damaged and worn down appropriately.
Inspect Your Gloves Regularly
Inspections are especially important when working with lighter gauge metals. A dull blade can sever your skin, whereas a sharper tip can nick you.
Pay Close Attention to the Condition of the Seams
Also, pay close attention to the condition of the seams. Are they frayed? Is the stitching broken? Have bits of loose thread fallen apart? All of these factors contribute to weakened durability.
Ensure the Gloves Fit Perfectly
And finally, never assume that the gloves fit perfectly. While there isn’t much room for adjustment, the wrong size can cause painful pinching, chafing, and numbness.
Here’s hoping that you enjoyed learning about how to clean welding gloves properly. Now you should be ready to tackle future projects confidently. Good luck!
The Bottom Line
Welding can be messy. The sparks of an arch welder are hot enough to leave debris on your welding gloves. And when you use filler metals, there may be slag in between your fingers after each joint has been made.
Hopefully, you learned a lot from this article. We covered topics ranging from the basics of cleaning to advanced details regarding maintenance. We believe you’ve gained enough knowledge to clean your own welding gloves and understand why you should do so.
Darell is a Certified Welding Engineer (CWEng) with over 23 years of expertise in TIG, MIG, MAG, dual flux, and stick welding. He is a senior welding engineer who has a desire to share his experience. Visit unwelded.com and join Darell as well as other welding enthusiasts in obtaining fabrication knowledge, amazing welding gadgets, and useful welding insights.